
Tutorial: How To Create Letter Engraving on Flat and Curved Surfaces with Creo Parametric 4.0
Learn how to create an engraving on a flat surface and a curved surface using Creo Parametric 4.0. Most high-end CNC milling machines are capable of letter engravings programming; Creo Parametric and other modeling software offers more control and portability.
1. Creating the Part Geometry
For this example, a simple extruded plate with an extruded rod will be used. Start by creating a part file, choose "Solid" and name your part what you would like.

Extrude the plate with dimensions 10" x 5" x 1".
Extrude the rod with dimensions 2" DIA x 3" LG and position the rod 2" in along the x-axis and (in this case) 2.5" in along the z-axis.

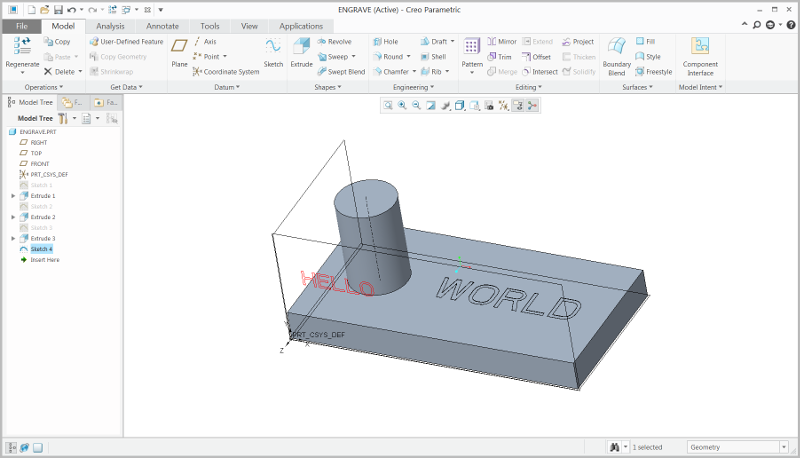
2. Engraving on a Flat Surface
Start by creating a sketch on the top surface of the plate and re-positioning the camera normal to the sketch plane. Under the "Sketch" menu tab, click "Text" in the "Sketching" section.
Click anywhere on the sketch plane to create the baseline of the text sketch and then move the mouse vertically and click again in a position where the line is perpendicular with the x-axis. The first point initiated the location dimension and the second point created the height of the text.
A "Text" window will appear now.
Enter the text "WORLD" in the "Enter text" field.
In the "Position" section, choose "Center" for the "Horizontal" and "Vertical" parameters.
Re-position the horizontal dimension to 6" and the vertical dimension to 2.5". Adjust the height to whatever value looks best and click "OK" to close accept the parameters.

Accept the parameters of the sketch to see the defined text appear on the top surface of the plate.
Under the "Model" tab, choose the "Extrude" option. Set the parameters to remove material and set the depth to 0.01". Click the check mark to accept the preview if it looks good.
And that's it! The text engraving on the flat surface is complete. The text font can be changed, and other parameters can be changed to your liking and based on the manufacturing method.

3. Engraving on a curved surface
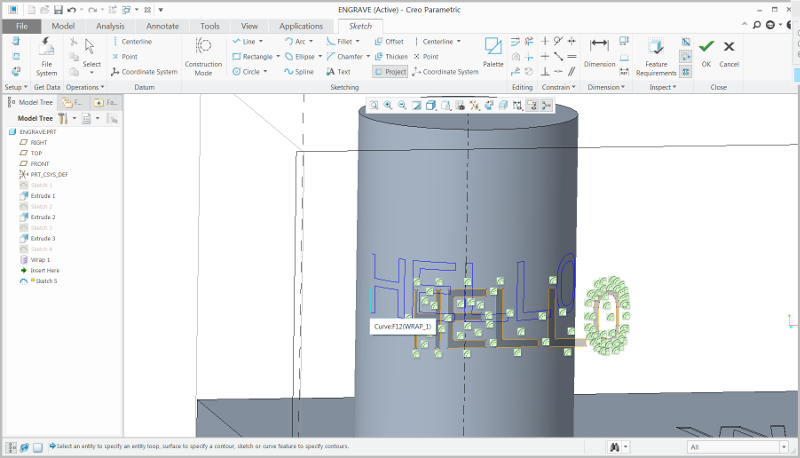
Start by creating a sketch on the x-y plane in the image below. Add the text "HELLO" to the sketch and center on the extruded rod. Accept the sketch once all the parameters are to your liking.
Under the "Model" tab, choose the "Wrap" option in the "Editing" section (you may need to open the drop-down menu). Click the created sketch with the text "HELLO" and you will see it projected onto the curved surface. "Wrap" will match the sketch to any curved geometry.

Now, create another sketch on the x-y plane as shown in the images below and change the view to be normal to the sketch plane. Under the “Sketch” menu tab, choose the “Project” option. “Project” will allow you to capture the profile of a curved feature on a 2D plane.
Choose the “Loop” option in the “Select Use Edge” window and click each letter profile. As the letter profiles are selected, their projection will appear on the sketch plane. Make sure to only select the areas to be projected – the letter “O” requires the inside edge and outside edge to be selected.
Select OK when the complete profile is selected.

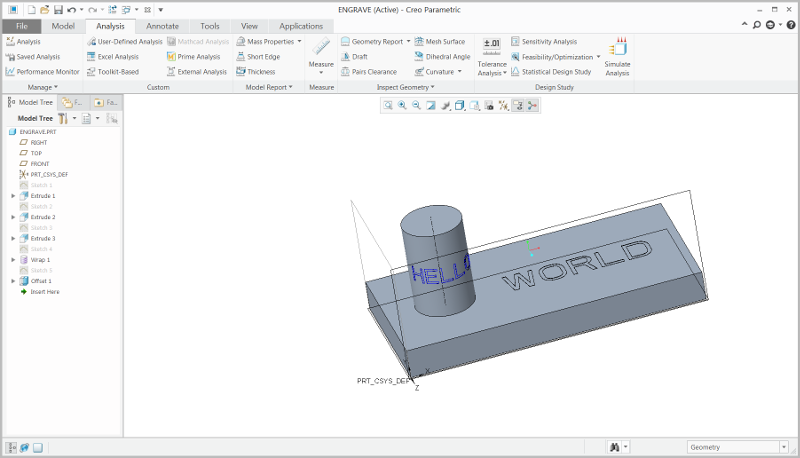
Select the curved surface with the wrapped text and, under the “Model” menu tab, select the “Offset” option in the “Editing” group.
Change the offset type to “Expand Feature” using the drop-down menu.
In the “Options” tab, select “Sketched Region” and choose the sketch created with the projection of the wrapped text. Choose either “Surface” or “Sketch” (depending on how you would like the engraving to look).
Reverse the direction of the offset so it is directed into the material and set the value to 0.01”.

Now both curved and flat surfaces are engraved!
Jarrett Linowes
Mechanical Engineer
omniamfg@gmail.com
Did I miss anything you are interested in? Send me an email or comment below!


